Making DIY Animal Bookmarks: A Step-by-Step Guide
 Colourful bookmarks certainly double the fun of reading a book, especially when they have cute, little animals on them. Today, we are going to make cute DIY animal bookmarks that can be used instead of folding down the corner of the book’s page. Let’s see how to make them!
Things you need:
- Papers
- Scissors
- Sketch pens
- Glue or adhesive
Procedure to make a DIY animal bookmark:
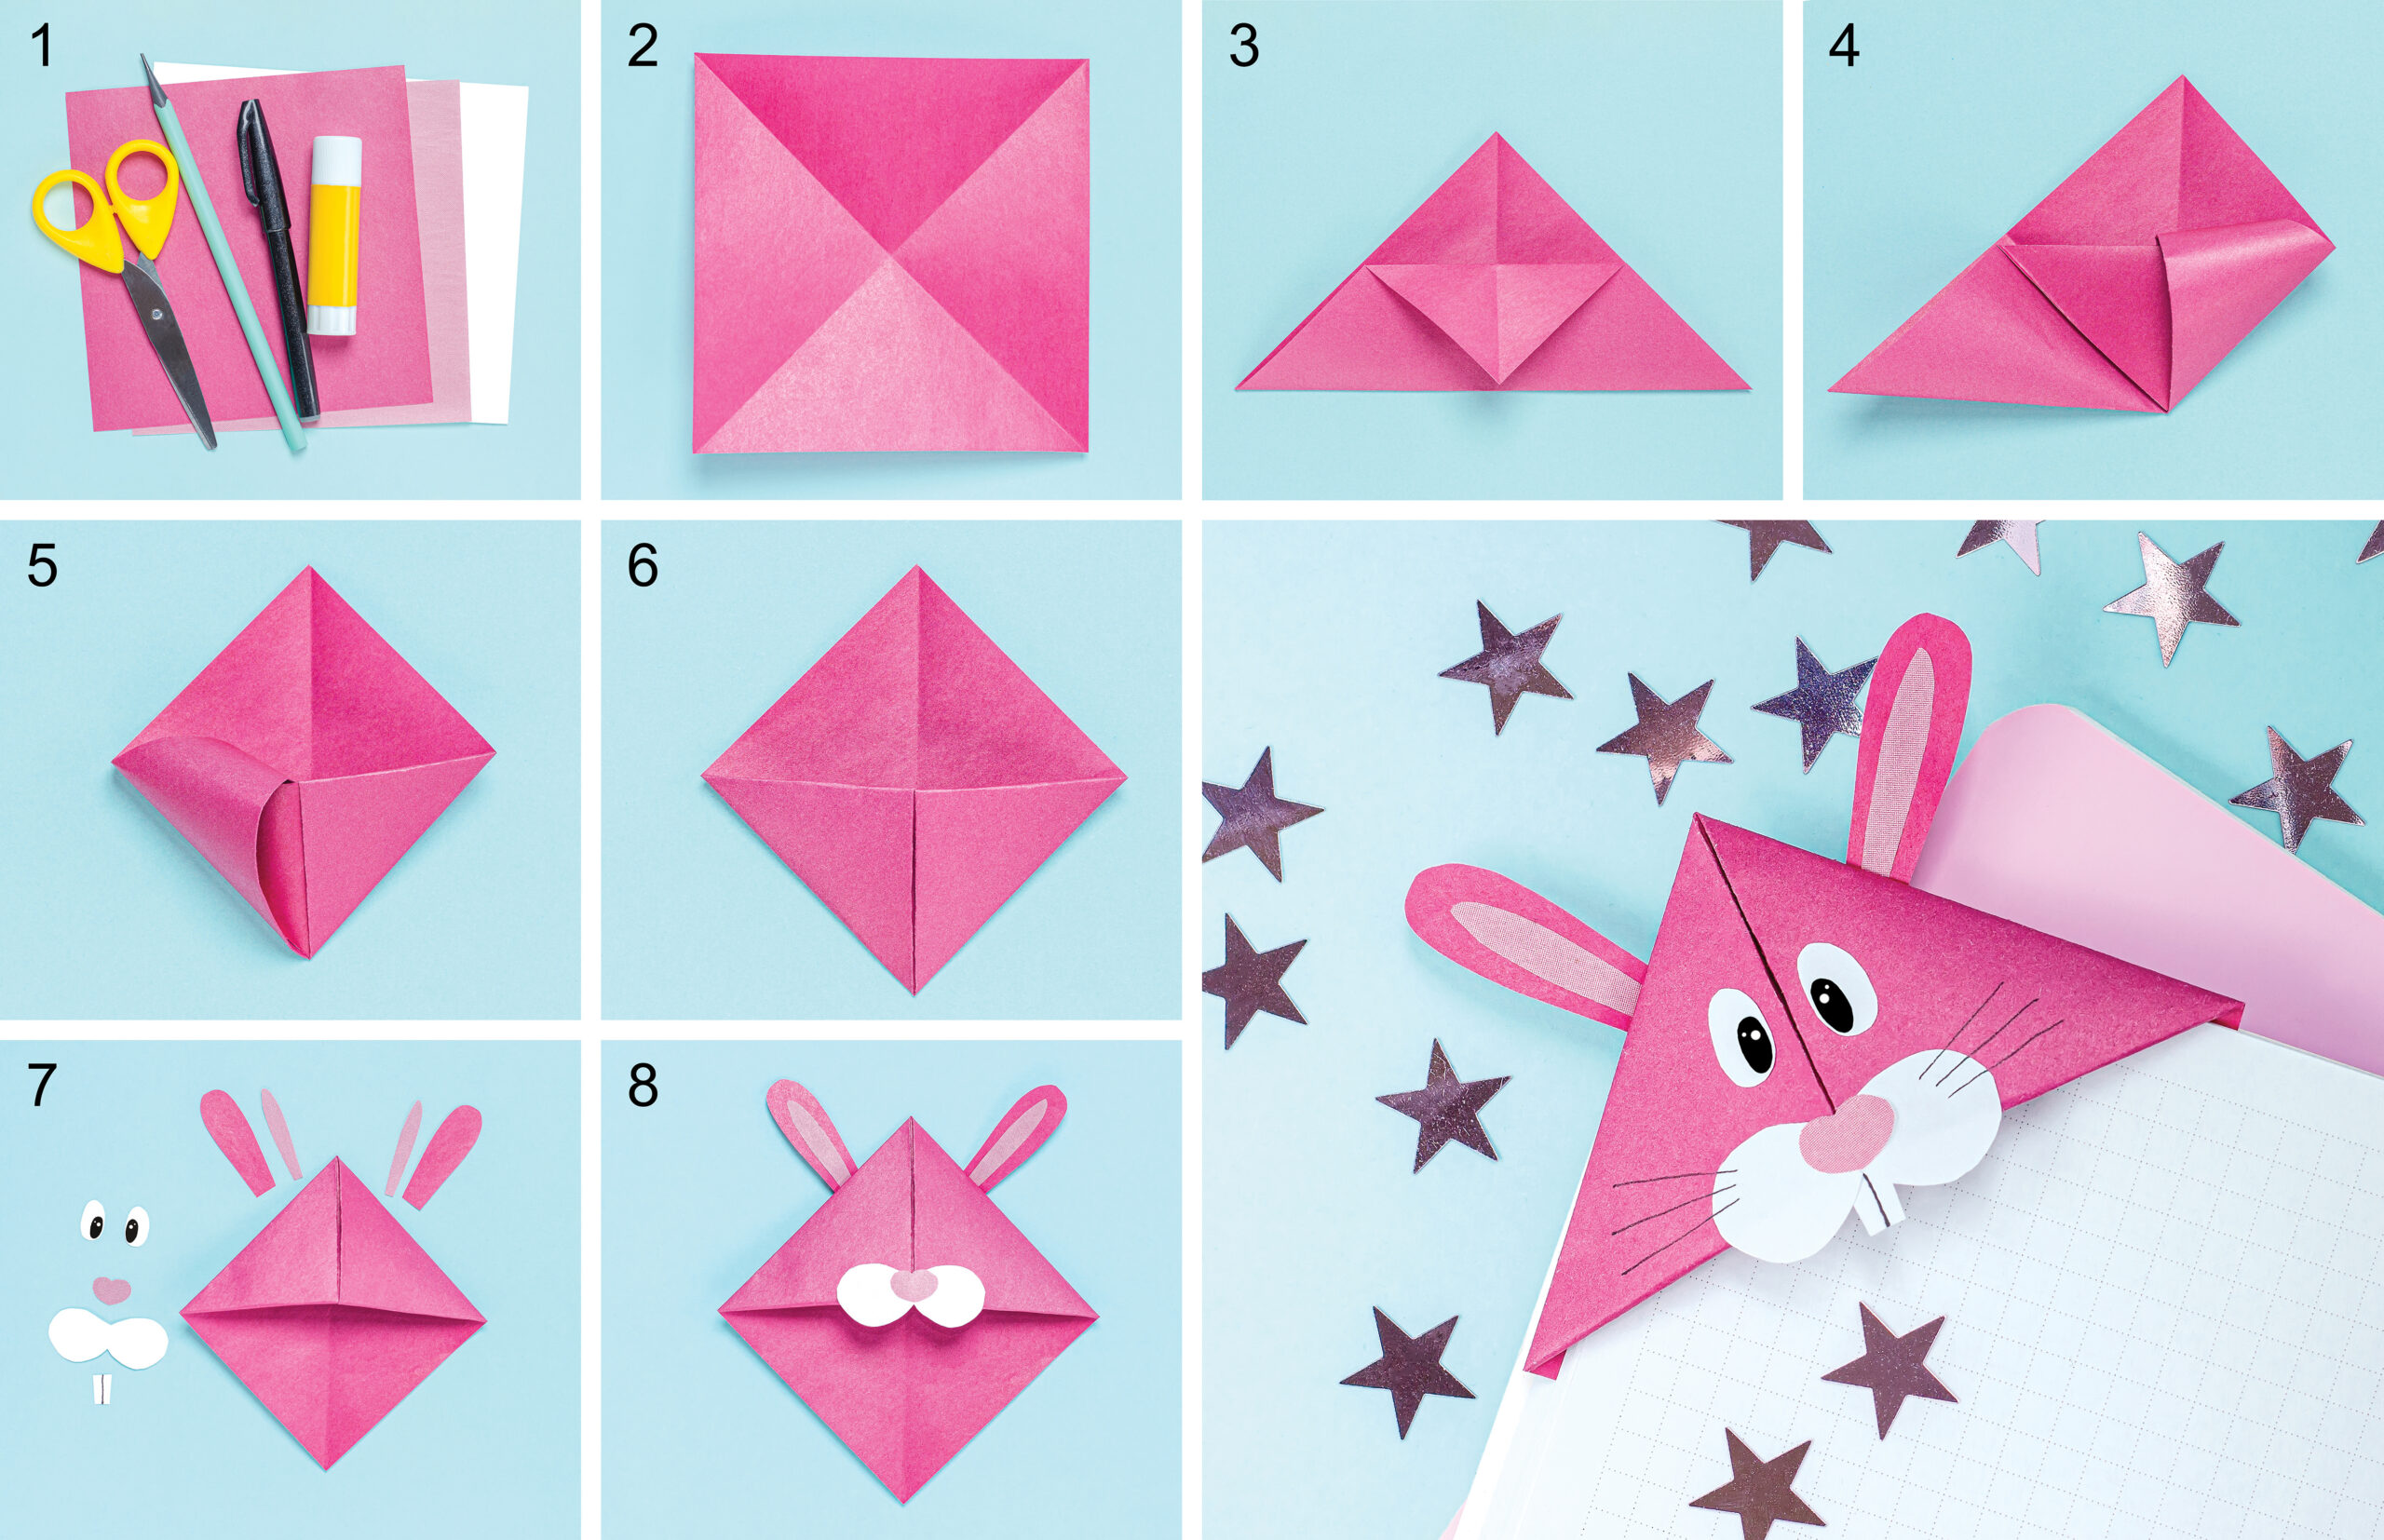
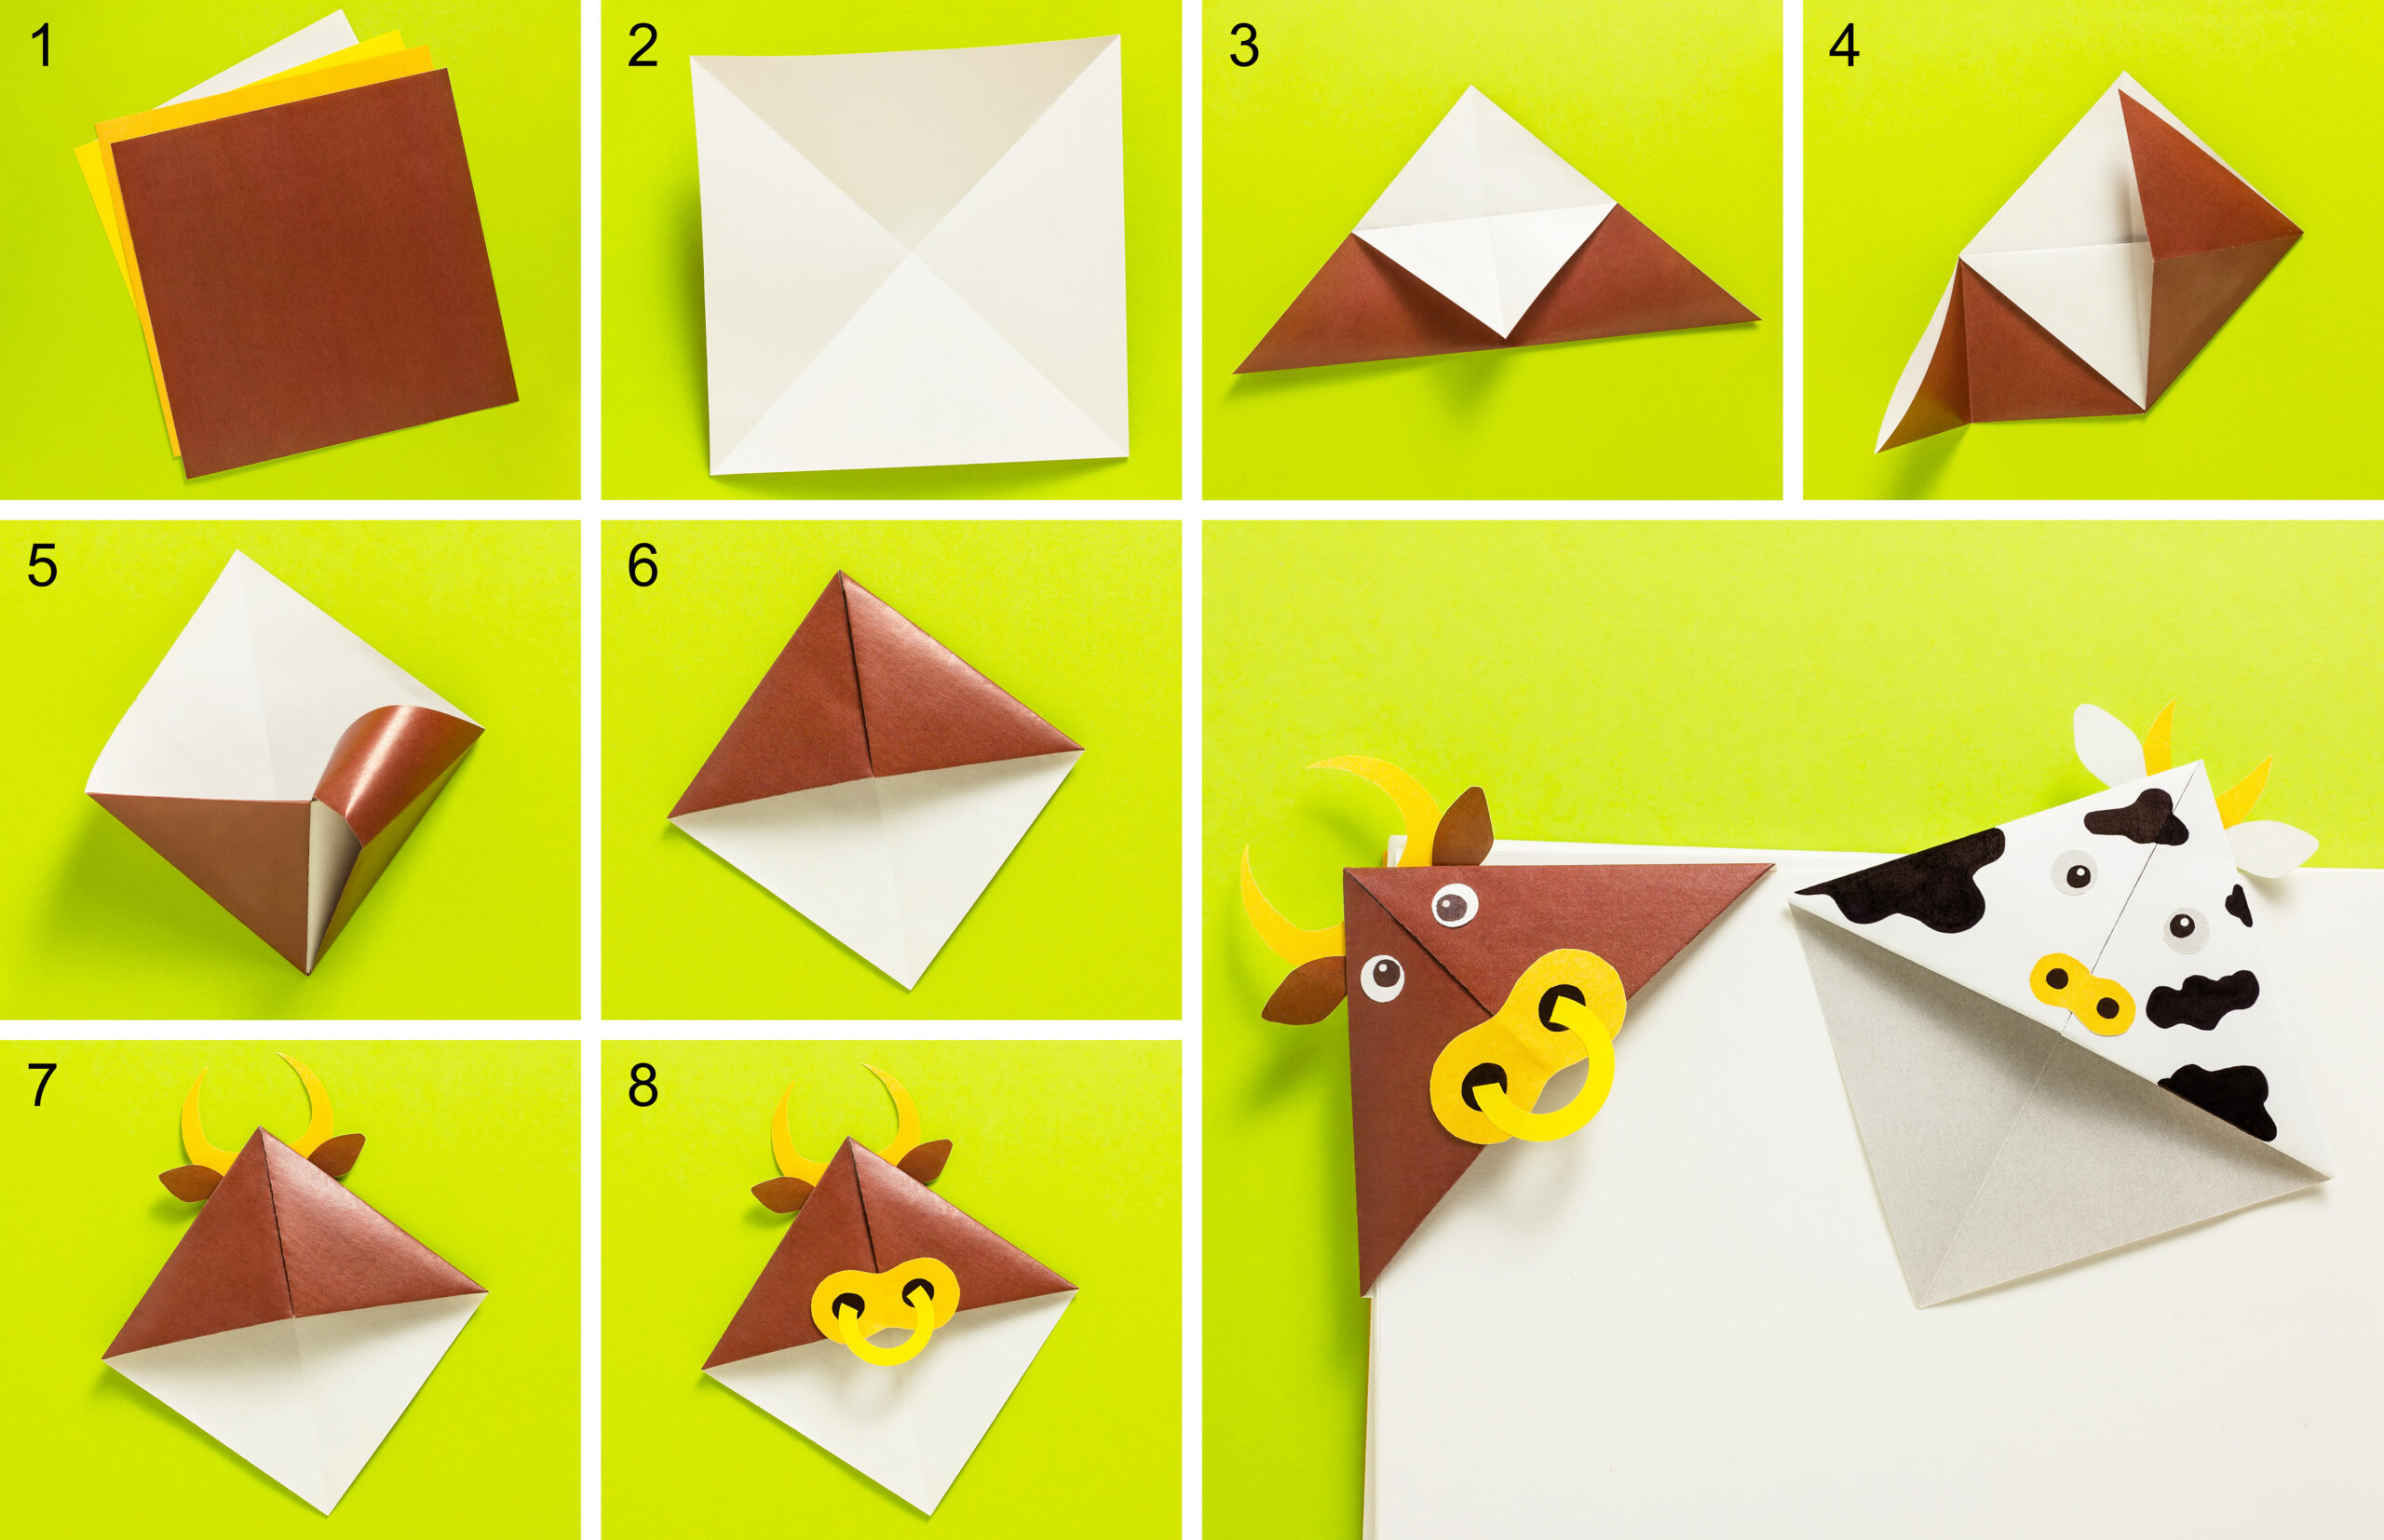
- Step 1: Gather all the things you need to make a DIY animal bookmark.
- Step 2: Fold the paper the way the picture shows.
- Step 3: Cut out the ears, nose, eyes, and so on as required to create an image. Take the help of grown-ups around you if you find it difficult.
- Step 4: To finish the bookmark, glue these parts of the picture together.
- Step 5: Repeat the process to make different animal bookmarks that you can rotate among your favourite books.
How to make a DIY rabbit bookmark:
Check out this cute little rabbit that can make any storybook pop!
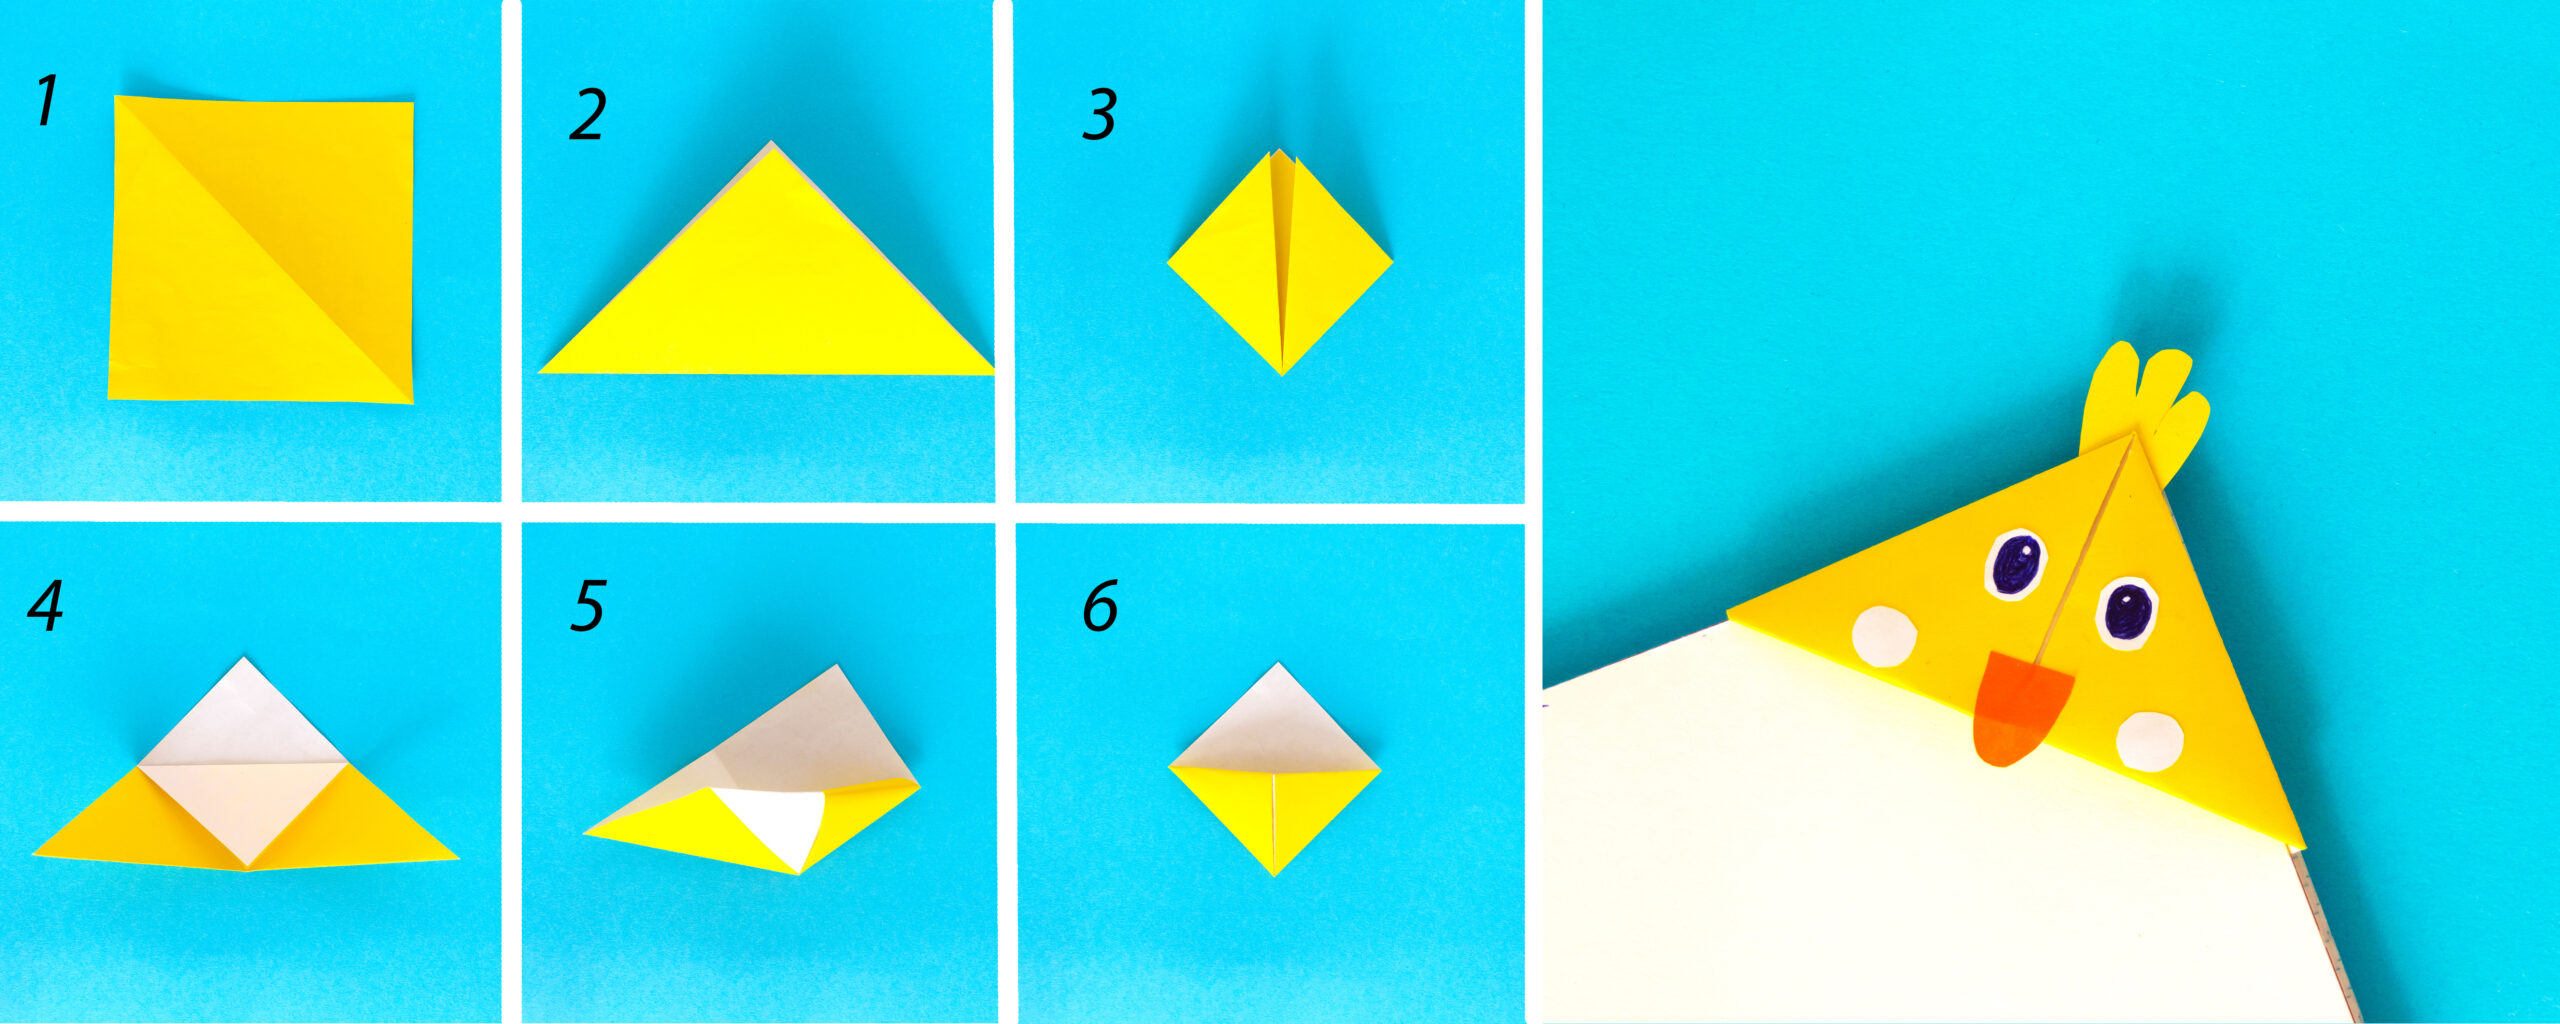
How to make a DIY hen bookmark:
This hen bookmark is perfect to mark your favourite recipe in the cooking book.
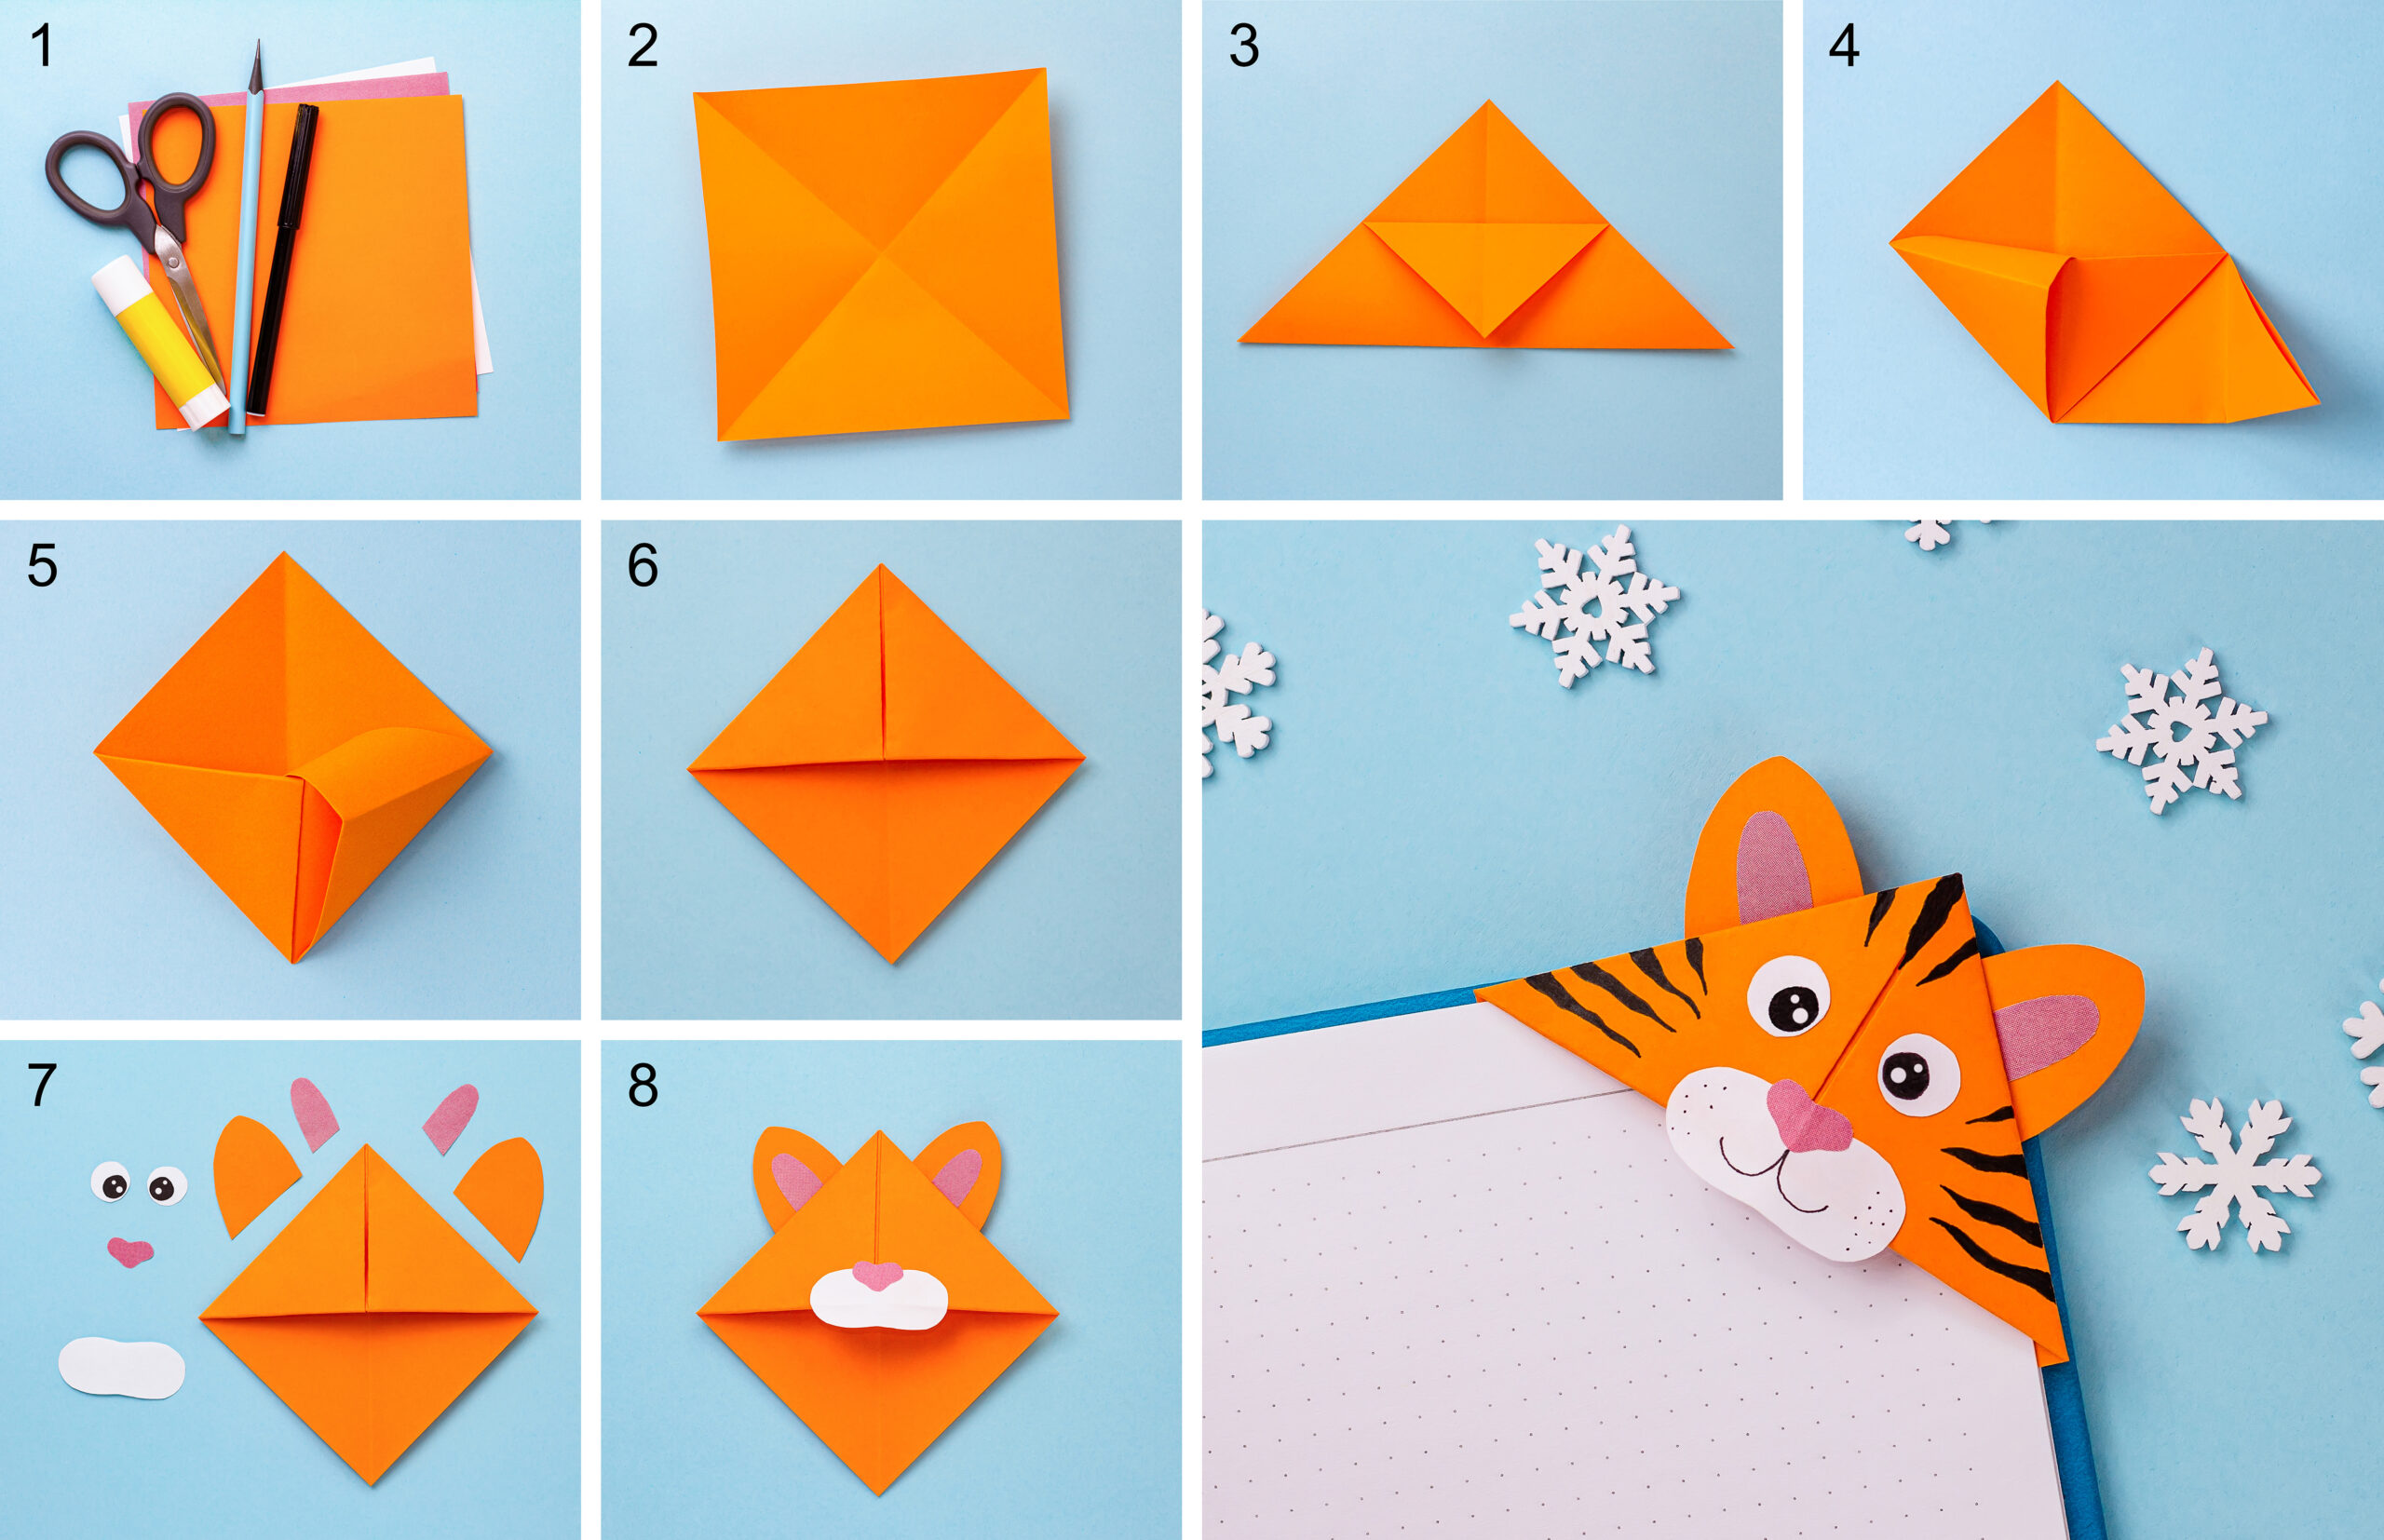
How to make a DIY tiger bookmark:
This tiger bookmark will help you pinpoint a particularly exciting passage from your favourite adventure novel.
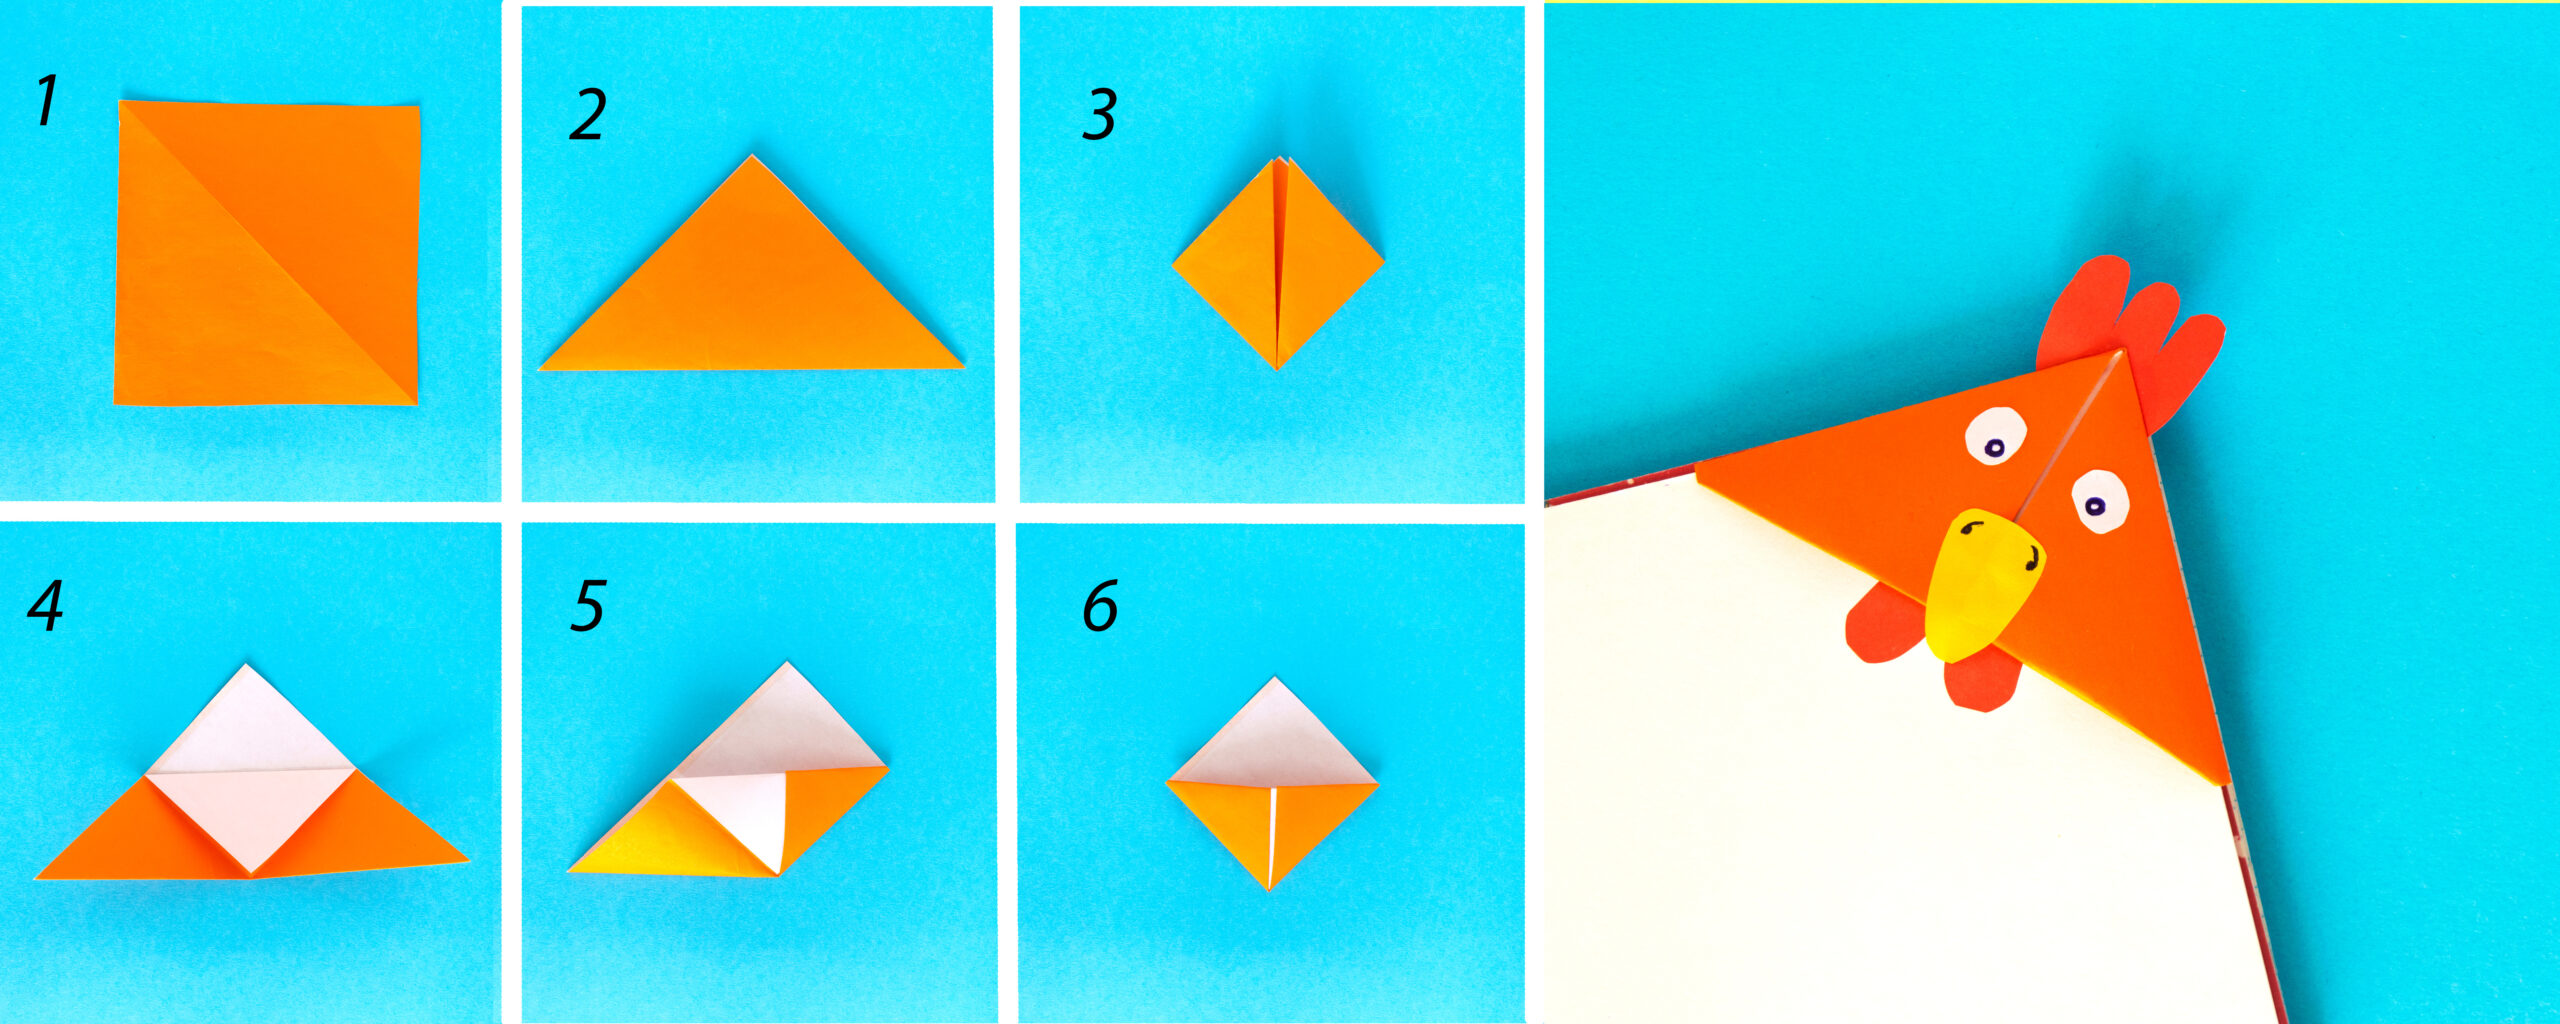
How to make a DIY rooster bookmark:
This rooster bookmark will come in handy whether you’re reading a book about farms, the outdoors or just trying to stay awake while reading a difficult book.
How to make a DIY bull bookmark:
This bull bookmark is perfect for any book with a powerful message, whether it is one of history or sports.
Did you like these cute bookmarks? Will you make them at home? Let us know in the comments below.
Also read,